Thursday, February 14, 2013

Micro experiment: part 2

Eight days into the growing


Broccoli on 2/14/13
This Tray of Broccoli was started on 2/7/13


Radishes was started 2/8/13
Today is 2/14/13 (look how much they have grown)


 The front crowded ones are the sunflowers ( they were seeded on 2/7/13) 
It has been one week now.


Sweet peas

These Sweet Peas were started on 2/6/13 
(This is now day 8 for the peas)


Updates


sun flowers getting bigger (2/14/13)

On 2/19/13, the sunflowers grows really tall.
(they are the ones in the center. the back left and right are the sweet peas)

Microgreens


These are ready to eat.


Sunday, February 10, 2013

General Tso's chicken

General Tso's Chicken 


This is one of Sylvia's favorite chinese take out dish.

Ingredients:


Vegetables: to prep and set aside
1 med red onion cubed
1 green pepper cubed
1 red pepper cubed


Meat marinades:
2 lbs of chicken breast or thigh meat thinly sliced
1 cup of corn starch
1/4 cup of sweet soy sauce
2-4 tbsp of water
Oil for deep frying

Fragrant for gravy:

1 garlic finely chopped
2 scallions finely chopped
1/2 inch ginger finely chopped

Gravy/Sauce: 
3 tbsp dark vinegar
3 tbsp dark sweet soy sauce ( braising sauce)
2 tsp hoisin sauce
1/4 cup of water
2 tbsp corn starch 
1 tsp hot chili paste
1 tsp hot chili oil
2 tbsp rice wine
4 tbsp of sugar or honey

Directions
1. Marinade the meat for 1 hour in the cornstarch soy sauce and water. 

2.  Mix all the Gravy/sauce ingredients together in a bowl 

3.  chop garlic, scallions and ginger very finely. Set aside the garlic, scallions, and ginger in a small bowl.

4.  In a medium pot, heat about 3 cups of vegetable oil till hot.  fry chicken pieces in batches. drain on paper towel, set aside.

5.  In a large wok, add 2 tbsp of oil, saute red onions, green and red pepper till fragrant. pour into a large bowl and set aside.

6.  In the same large wok, add 1 tbsp of oil,  add garlic, ginger and scallions, saute till fragrant but not burned.  Add all the gravy /sauce to pot and bring to a boil, till thickned.

7.  when sauce is thickened, add the fried chicken meat and all the vegetables.  toss well to coat the meat.  

8.  Serve with white steamed rice.


Japanese Pan bread


I have been very very productive in the past three days thanks to Nemo, I'm stuck at home with 2 feets of snow, what is there to do but cook and create projects.


Here is another weekend project that I have wanted to do for a while.  Learn how to make delicious Japanese pastry shop sweet Pan bread.  some called it Hokkaido bread.  This is another one of those olfactory/taste bud memory from my childhood.
 I got to have some right now!

It was not too hard to make .  The Secret ingredient is:


TangZhong mix
This is the secret ingredient!!!!  it is very easy.  Mix 1/3 cup of bread flour with 1 cup of water or ( 1/2 cup water and 1/2 cup of whole milk)  I used the later version.  mix well in a small pot.  place over medium flame and keep stirring until it starts to thicken.  Use a thermometer and the allow the mixture to reach exactly 150 F.  take off the stove and allow to cool.  Use this for your bread recipe.


This is what TangZhong looks like when it is ready at 150 F.


MicroGreens experiment


So I have been spending too much time on Youtube, internet, and seed catalogues checking out organic gardening and growing greens.  I discover a new trend called Microgreens.  Apparently, these are tiny 1-2 inches of baby seedlings that are grown for high-end restaurants as garnish and salads and they have 3-6 x more vitamins, minerals and antioxidants than the grown counter parts of these vegetables.  They look so cool and easy to grow.  I tell myself,  " I got to grow some right now!"


This is what they look like at a professional nursery.


Such beautiful succulent baby greens.  ( this is the pros)


Here is my experiment.
This is broccoli


Here is the set up on a south facing window.  It is in the middle of February, Storm Nemo just passed us, look at the snow outside of the window.  We had about 2 feet.

I planted Broccoli, sweet peas, chick peas, radishes, sunflower seedlings, cranberry beans.
I'm not sure that cranberry beans can be a micro green but what the heck, I bought it at whole foods and was too lazy to soak and cook it.  So I decided, why not, I'll grow into baby greens and saute it with garlic and olive oil,  my hubby will eat it.  


These are sweet peas


I spend 1/2 the day making this wood frame to hold up the grow lights.  What do you think?
I hope they will grow.  I'm planning to also grow all my outdoor vegetable garden seedlings by March. Got to have Zucchini, tomato, cucumber, romaine, bok choy, lots of Italian roma broad beans basils, nasturtium and maybe Tayso ( a Japanese green).

I'll keep you updated.

Dim Sum favorites


When we go to any Chinese Dim sum restaurants, we always order Shrimp Rice Noodle Roll.  It is my children's favorites.  The wait staff are often surprised when we order 7 plates of Shrimp noodle roll.  "Seven, you want Seven?"  " Yes, and we also want some Har Kaow" These are Crystal shrimp dumplings that is our second favorite.  After month of research on my mom's Chinese cook book, library, I finally found a few recipes on the internet.  My younger daughter who only will eat Shrimp rice noodle roll at dim sum was not feeling well.  I promised her all weekend that I will make her the shrimp noodle rolls.  So here are our first attempt.


rice flour


3 tbsp wheat starch


2 tbsp Tapioca starch


A scale is handy

Add 200ml of cold water the this mixture.  mix well. Then Add 300 ml of boiling hot water and mix well.  Allow the mixture to rest about 20 min


Stir the mix very well right before ladle it into the greased cake pan.


Tilt the pan to evenly distribute the batter.  You can do this with the steamer lid down if you have a glass window to observe the process.  Steam batter on high for 1:30 min.

After the batters firms up in 1 1/2 min, place shrimp along the center and cover the steamer, steam for another 2 minutes till the shrimp is all pink.


 Like this.

Remove the pan and place immediately on a cold water bath to cool.

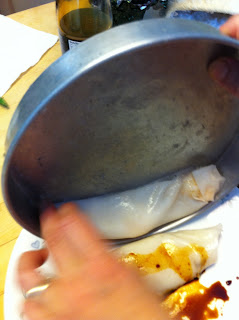
 cooled.  Using a thin spatula, carefully lift the edges.


lift the edges using a thin spatula carefully.


Start rolling the noodle over the rice


keep rolling the rice roll


Keep rolling


Place the noodle roll on a platter


 Garnish with scallions and sweet soy sauce


Yummy!


Saturday, February 9, 2013

Naan bread and all kinds of fillings


My teenage daughter made a batch of Indian Naan bread yesterday and we ate it all in less than 24 hours.  She decided to make more today, since my younger daughter decided to use 2 pieces of Naan bread to make a salami sandwich.  Storm Nemo had just arrived and we ran out of regular sandwich bread.   We are so desparate that we started making all kinds of food and breads.

We had some left over roast turkey breast and mash potatoes.

 Left over turkey and scallions
 Nan bread with turkey


 I added some Mozzarella and sprinkle some Red curry powder by McCormick (This is my favorite curry powder) and salt for flavor.


 make a pouch or bun

 flatten it out with fingers 


and roll it out flat 


this flat

 cook on high heat in well oiled pan

Turn to the other side and cook more


Yummy

 serve with sweet and hot Chutney


Taiwanese Ba Wan


My first attempt


After many month of research and finding ethnic ingredients in asian markets, I'm finally braved enough to make my first Taiwanese Ba Wan.  I have fond memories of eating these sticky chewy meat filled pastries in the little night stalls in Kaoshung ( did I spell this right?) in Taiwan.

 I found sweet potato starch.

 any corn starch will do
 This is the most common rice flour.  Make sure you do not get the "glutenous type" in a green bag.  The glutenous type is for making "Mochi"

This red bag rice flour is made of long grain rice.
 First mix 1 cup of rice flour with 7 cups of cold water in a large pot.  Stir well with a large whisk and remove all lumps.  place over high heat and continue to stir non stop for 30 min until the mixture starts to bubble and thicken.  ( It is very handy to have a willing teenager around) Once it boils,  continue to whisk and stir for a few more minutes.  Remove from heat and allow this to cool down to lukewarm before you add the sweet potato starch/corn starch mixture.

Meanwhile, mix 1 2/3 cups of sweet potato starch with 1 cup of corn starch in a bowl.
 Once the rice/water mixture has cooled down after 15 min, start adding the sweet potato starch/cornstarch mixture.  Use a flour sifter -slowly sift dry flour into the large pot.  It helps to have a strong teenager or dutiful husband to stir the pot while you leisurely  sift the sweet potato flour mixture in.  Continue to add the flour mixture until the consistency is like a thick cake batter. ( Well, more like sticky glue.  It should be firm enough to spread but soft enough to easily spread onto a bowl using a spatula.


 Grease 12-14 small rice bowls.  the flatter the bowl the easier to spread the batter.  Place about 3 tbsp of batter into the bowl, using a small rubber spatula to spread and coat the bottom evenly. ( takes some practice)
Add 2-3 tbsp of the meat mixture into the bowl,  Top with 2-3 more tbsp of rice glue and cover the meat mixture.

Important note: ( If you have any left over rice glue, do not throw it out.  You will be needing 1 cup of it to make gravy)
 Have a steamer ready with boiling water.  place the prepared bowls in and steam for 15-17 min depending on the size of your small bowls.  If you use flatter bowls, cook for 12 mins until the rice glue looks translucent.
 ready to steam

 waiting to be steamed.  The four front bowls are the smaller thinner bowls.  They are actually alot easier to work with.  I would recommend using the thinner (condiments ) bowls.  You can get them in asian grocery store.   They are usually made for dipping soy sauce.
 Final product with the spicy gravy.


Skin / outer wrapper:

1 cup of Rice flour
7 cups of cold water
1 2/3 cups of sweet potato starch
1 cup of corn starch